Connect Pipedrive to lemlist
To get started, make sure you have an active account on both Pipedrive and lemlist. After logging in to both platforms, follow these instructions:
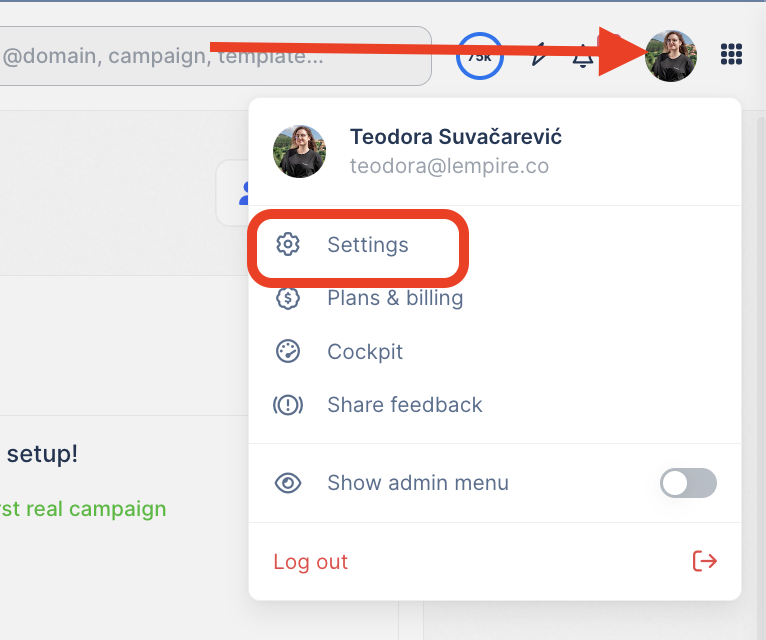
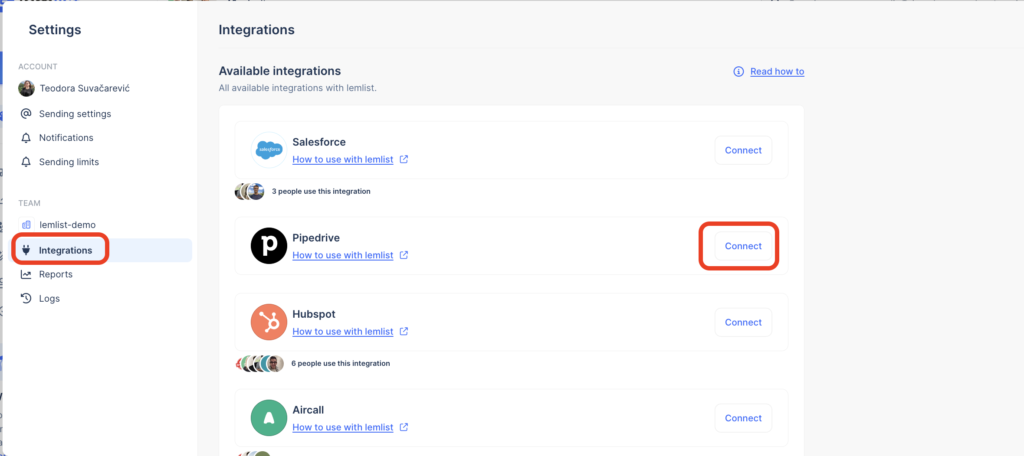
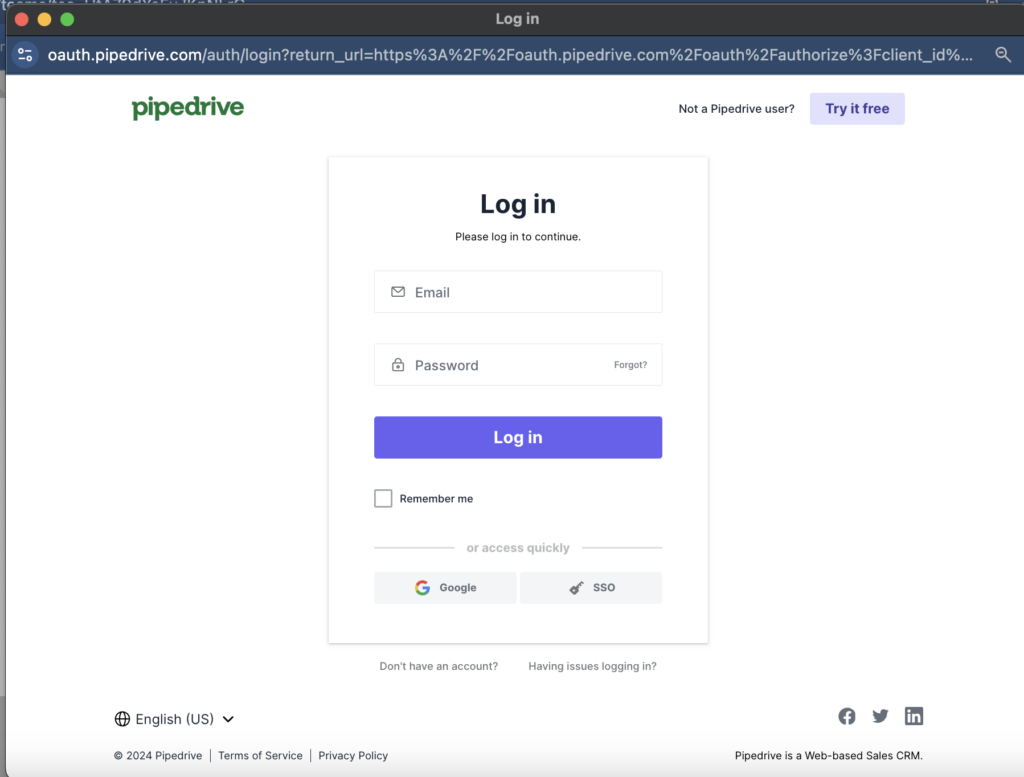
If you’re not already logged into Pipedrive, a login window will pop up.
Add Custom Fields to Pipedrive
For lemlist to send data to Pipedrive, you need to add custom fields in your CRM.
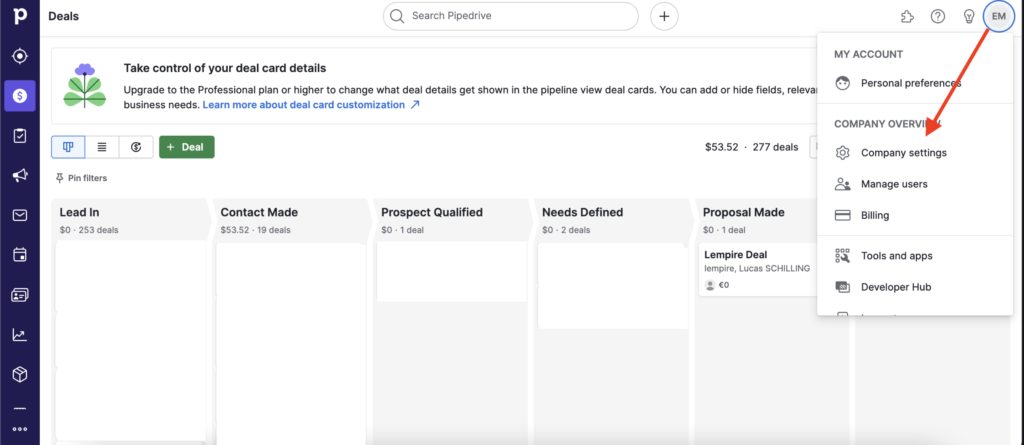
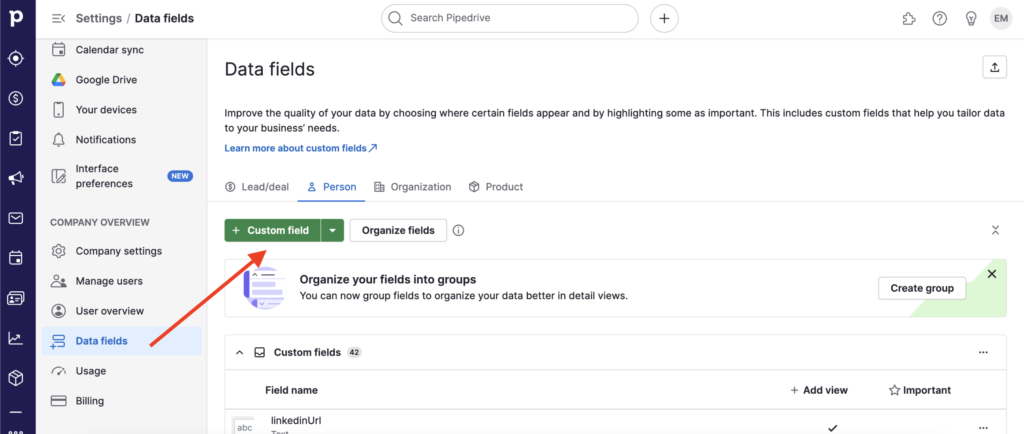
- Enter the Field name (e.g.,
lemlistChannelorfirstName). - Choose the Field type (e.g., text or long text).
Note: Field names are case-sensitive, so be careful to avoid extra spaces or mistakes.
Recommended Fields
- For Deals:
- Field name: lemlistChannel, Field type: text
- For Person:
- Field name:
firstName, Field type: text - Field name:
lastName, Field type: text - Field name:
linkedinUrl, Field type: text - Field name:
lmlstCampaign, Field type: text - Field name:
lmlstStatus, Field type: text
- Field name:
- For LinkedIn Enrichment: Add additional fields like
occupation,skills,companyName, etc. - For Company:
- Field name:
name, Field type: text - Field name:
industry, Field type: text - Field name:
domain, Field type: text
- Field name:
Activities
To have custom icons for your activities, ensure you have the following in Company settings under Activity types:
If any are missing, click the green “+ Activity type” button to add them.
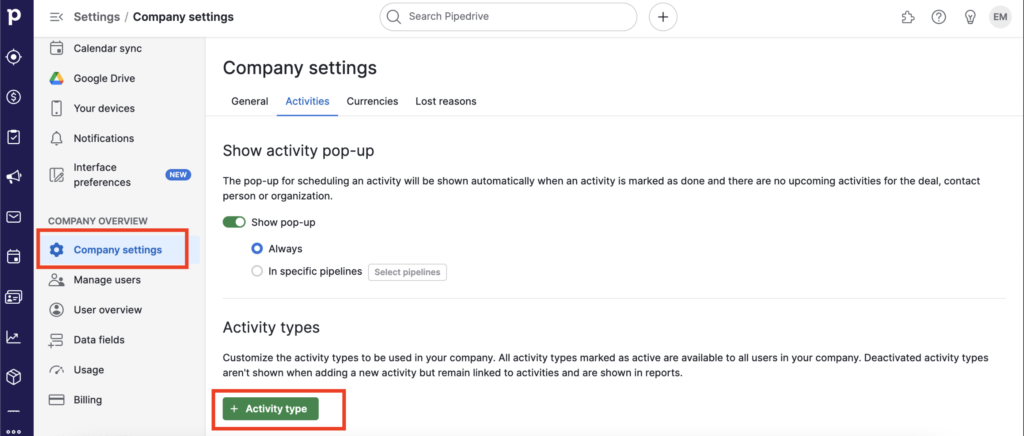
Once you’ve added all the necessary activity types, Pipedrive will automatically receive this information from lemlist.
Set Up Your CRM in lemlist
Once you’ve added custom fields, the next step is to set up your lemlist campaign to send the right data at the right time.
Import Leads
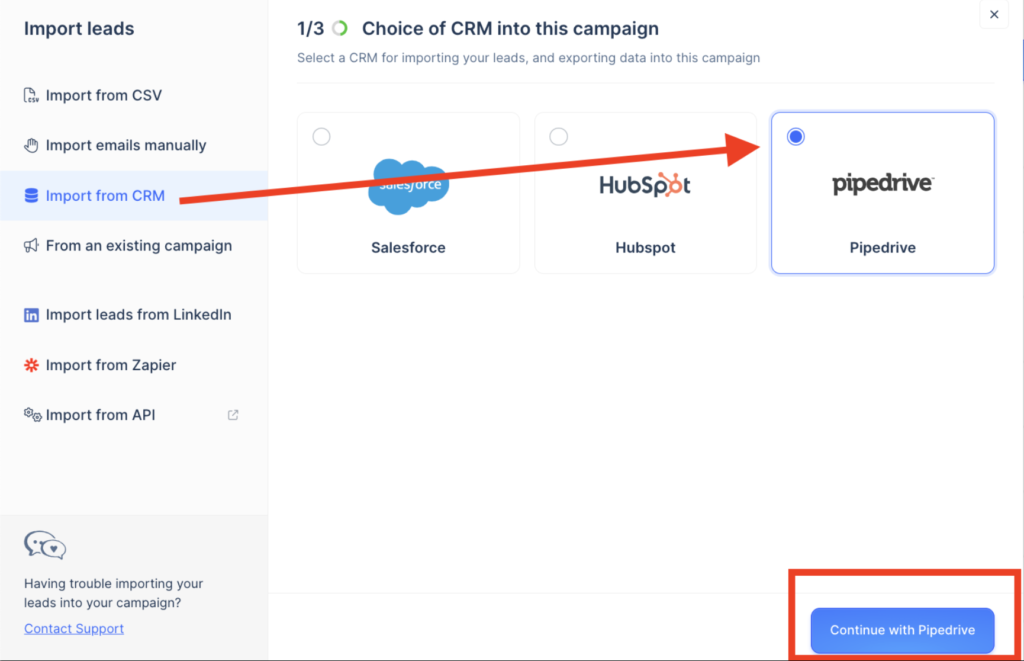
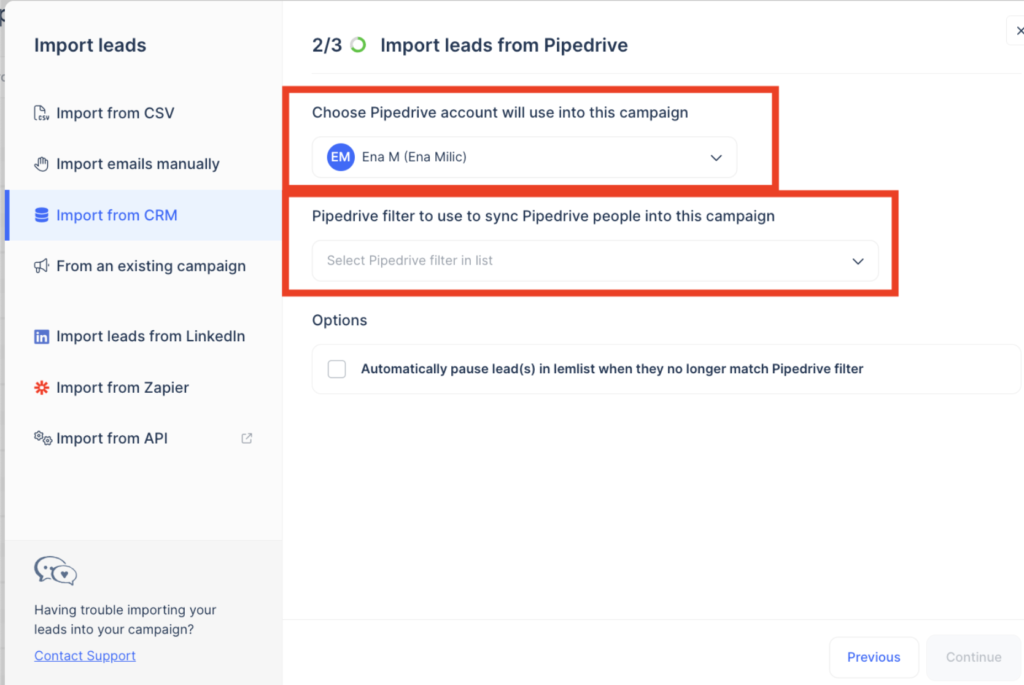
You can also import leads via:
- lemlist’s LinkedIn extension
- Manual upload through your CRM in the Settings tab.
Create Deals in Pipedrive via lemlist

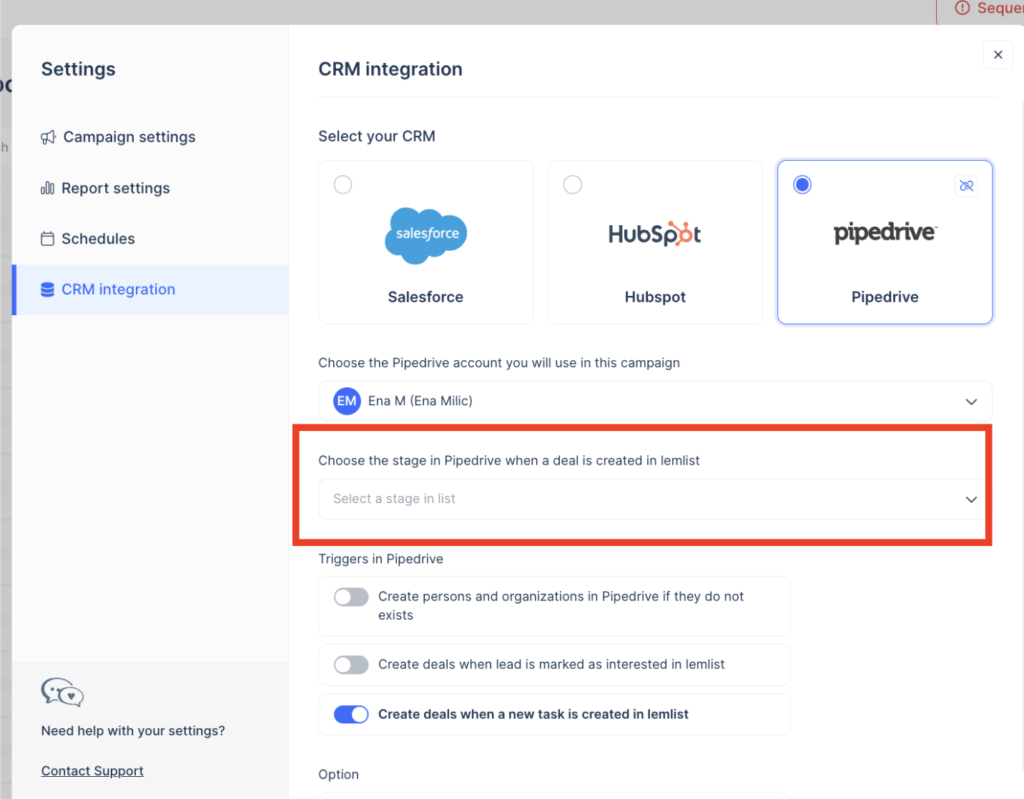
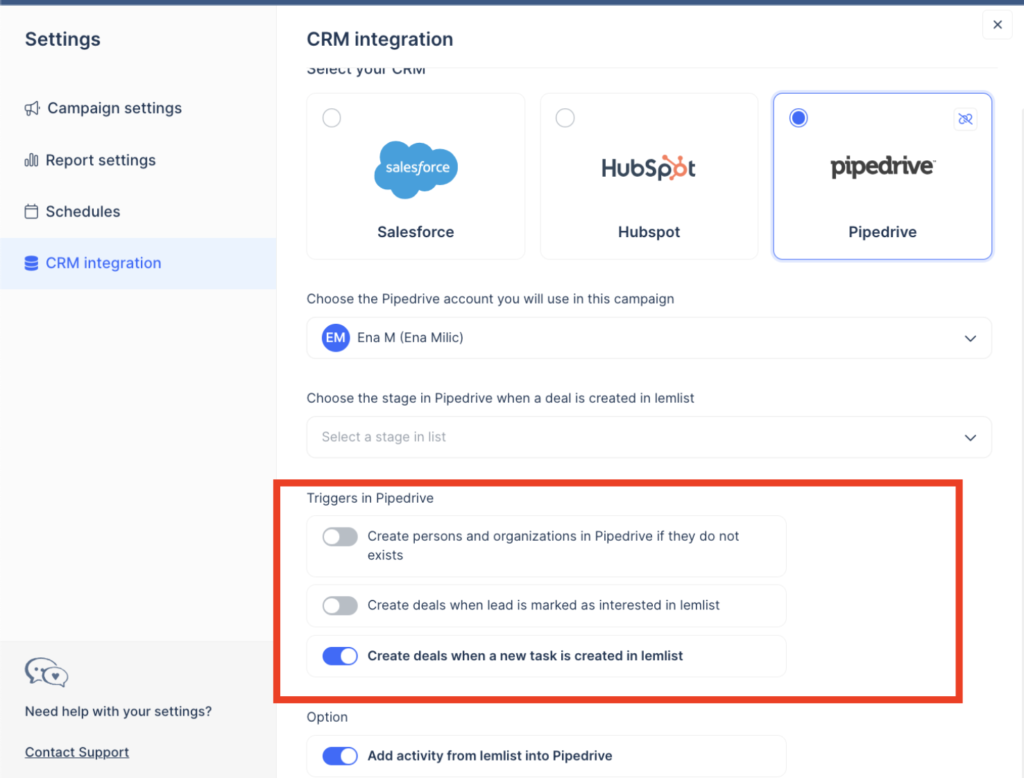
Note: lemlist only creates new deals; it doesn’t move deals between stages.
Manage Lead Activities
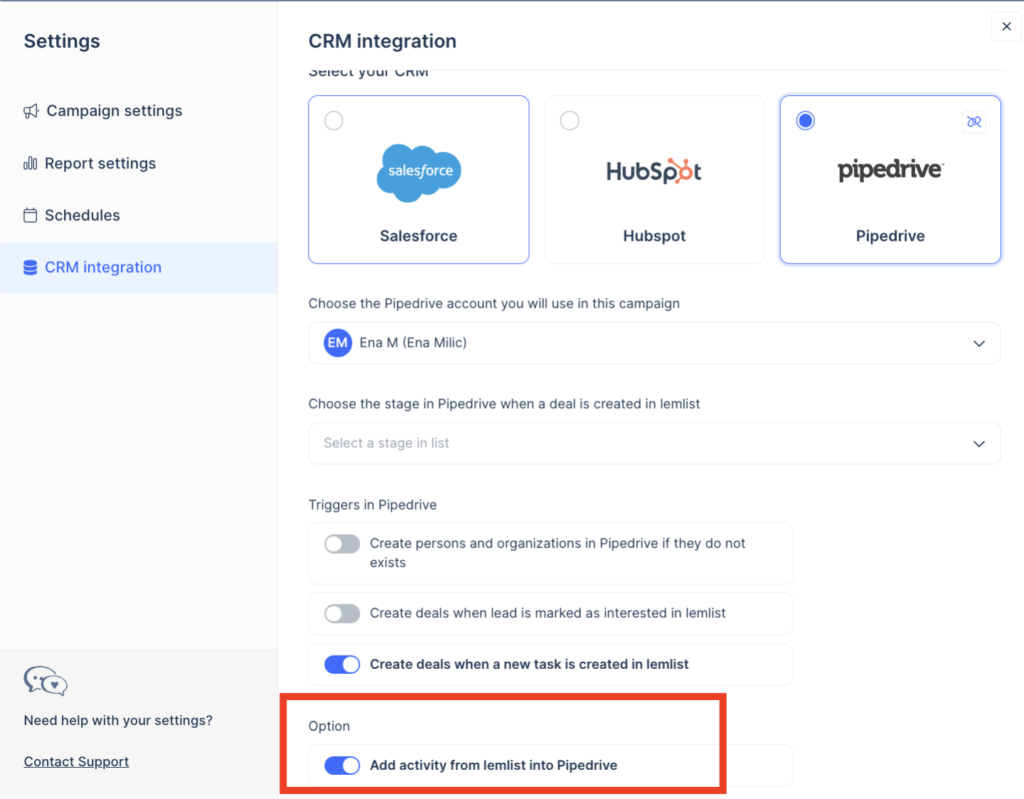
All lead activities, such as email opens, clicks, and LinkedIn actions, are automatically logged as notes in your CRM. If you want to stop this, you can disable activity tracking, but it applies to all activities or none.
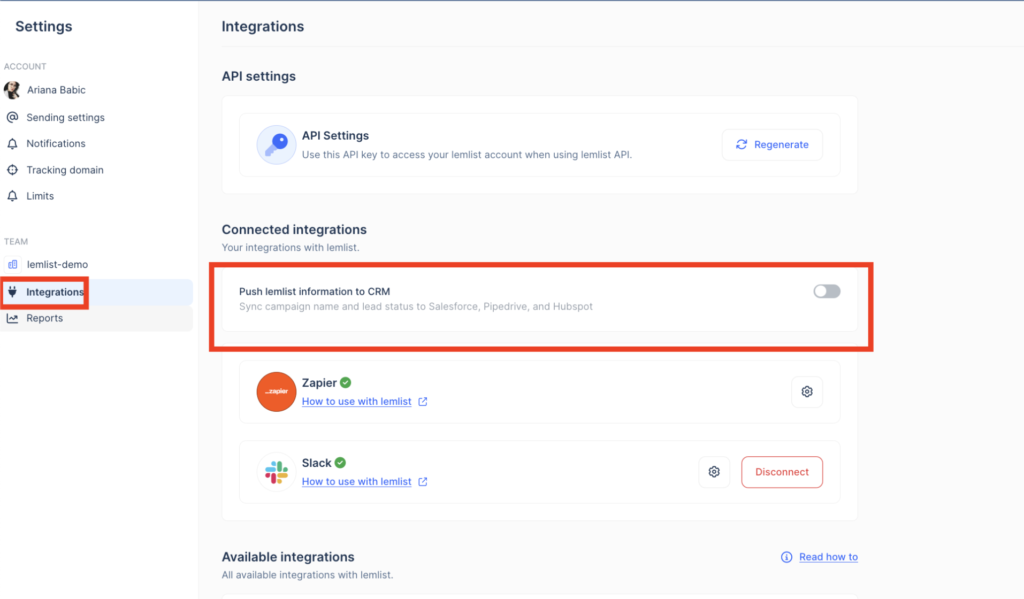
To sync campaign names and lead statuses, go to Settings > Integrations.
Handle Duplicate Leads
You can decide how lemlist deals with duplicate leads when importing through API, Zapier, or manually.
You’re Done!
You’ve just made your outreach more efficient! Enjoy your streamlined workflow.
